Now you have a Streamyx/broadband connection at your home. However all that bandwidth is going to waste since you can’t share it with your notebook, your PDA (i.e. Clie TJ-37, Clie NX80V/G with PEGA WL-100) and other wifi capable devices in your house. The only thing you need to buy is a wireless access point (AP) to share the broadband access.
The only thing for you to decide is whether you want fast access (54MBps) or standard/enhanced access (11/22 MBps). If you want fast access, go for 802.11g access point, else go for 802.11b access point. Since the price difference is so little, I would recommend going for 802.11g.
I would like to recommend the following models since I find them easy to configure and quite easy to maintain;
- For 802.11b (B) – D-Link DI-714P+
- For 802.11g (G) – D-Link DI-724P+
Setting It Up – Hardware
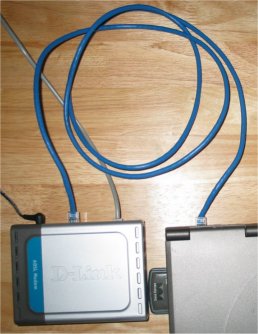
Initially your PC is connected directly to the Streamyx ADSL modem via the network card/port.
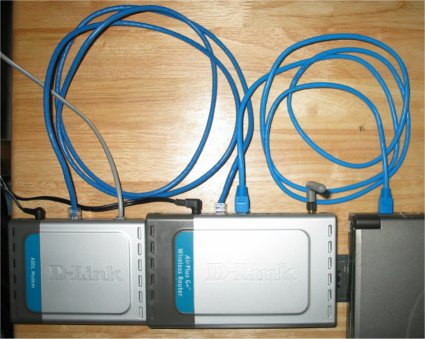
Now we are going to put the wireless AP in-between the ADSL modem and the PC.
Shutdown both the PC & ADSL modem. Then remove the network cable from behind the PC (it originates from the ADSL modem) and connect it the the WAN port of the wireless AP. Take the network cable supplied with the wireless AP, insert one end into any of the LAN port on the wireless AP and the other into the network card/port on the PC.
Start the ADSL modem, followed by the wireless AP. Then start up your PC.
Setting It Up – Configuring the AP
Once the PC is running, switch on your web browser. On the URL box, enter “http://192.168.0.1” and press enter (may differ for different products. RTFM).
You can use the wizard to set it up. Basically you need to set the WAN page to the following configuration;

- select PPPoE
- select Dynamic PPPoE
- your username “youraccount@streamyx” i.e. “palmx@streamyx”
- your password. If you do not know your password (since everything wasdone by the technician), chances are that it is still the defaultpassword, which is “tmnet123”. Please change it ASAP. If you don’t knowhow, RTFM.
- no need to configure the DNS. However, if you want to, it is202.188.0.132 and202.188.1.5.
- set it to “connect on demand” if you do not want it to connect toStreamyx 24/7.
- click the “Apply” button.
Now test whether your desktop PC can connect to the Internet or not. Just open the browser and surf to any site, i.e. http://www.palmx.org. If you can connect, then the settings are correct, else check your username and password.
For the wireless page, just set the SSID name to something familiar to you. For mine, I set it to drtamil. You can set yours to palmx, dukeair or whatever. Leave the wireless security settings for the time being. We need to see whether you can connect your notebook to your wireless AP first.
Get your notebook to scan for wireless access. Select your SSID and connect to it. You should be able to surf on the Internet now using your notebook. If not, check the TCP/IP configuration of the wi-fi card on your notebook. It should be configured for dynamic IP.
Setting It Up – Securing the Access
Right now anybody can park outside your house and surf the Internet at your expense. Therefore you may want to secure it. There are many available configurations for this, just read the freaking manual (RTFM) that comes with the wireless AP. The easiest method (but not the safest) is to use WEP.
Switch on your web browser. On the URL box, enter “http://192.168.0.1” and press enter (may differ for different products. RTFM). Don’t forget to reset the password for administering the wireless AP to prevent it from being hijacked by outsiders.
Now click on the wireless page and set the following;

- security; WEP
- encryption; 64 bit (can set higher)
- key mode; ASCII (can choose HEX also)
- WEP Key 1; choose 5 alphabetical and numeric characters and enter it here. Best to use a mix of both.
- apply the settings.
By now you’ll notice that your notebook can no longer access the Internet. Just click the wireless settings on your notebook and select WEP. Then enter the key that you entered on your wireless AP.

Now your notebook can browse the Internet again. You have to do the same for all your wi-fi capable devices in your house.
Have fun trying it out!!!
This article is dedicated to Professor Dr. Krishna Gopal Rampal. Congratulations on being awarded as the “Tokoh Keselamatan dan Kesihatan Pekerjaan Kebangsaan 2004”.